Thursday, December 19, 2013

For Always Birthday Card -- Front & Back Stamping


After watching a CTMH video demonstrating the "front and back stamping" technique,
I gave it a whirl.

First I turned the stamp to the back side (flat side) and masked the top of the cupcake so that only the paper liner would show.  I stamped this in Honey and the shape came out evenly covered.

Second, I cleaned the stamp, then turned it over to the front side, and stamped the entire cupcake shape with Lagoon ink. That allowed me to see the cupcake paper "pleats" and also the icing.

Then I added a few sparkles to the icing.

I also used:
For Always patterned paper, Honey paper, Honey ink on the birthday sentiment,
and Baker's Twine

I think this card turned out sweeeeet! It was fun trying something new too!
It was a fun way to begin the NEW year!
Happy New Year, and Happy Creating!

Tuesday, December 10, 2013

Event Calendar -- Gift for a Man


Our son-in-law admired an event calendar I had made for our daughter,
so I surprised him with a masculine version for his December birthday.
He's going to hang it in his office and ask each of his patients
to add his or her birthday to the calendar.

What a thoughtful gesture!

The CTMH event calendar (perpetual) makes a great gift for anyone--
I don't know what I'd do without mine...

You never need to re-write special birthdays/anniversaries on calendars
once you make and use one of these!

Monday, December 2, 2013

Noel Card

A card made by Sandy Trammel inspired my "Noel" card -- 
I regret not bookmarking the link, but will add it when I find it eventually!

I used: Kraft paper, burlap ribbon, CTMH Cricut cartridges for the poinsettia 
and the Noel title, Sparkles and Liquid Glass.
I photocopied the Christmas carol from a songbook we've used through the years and printed it on Colonial White cardstock to keep the vintage look.

This is one of my favorite cards so far since I love playing music,
and my favorite color is red!

Thursday, November 28, 2013

Blessed!


Blessed Thanksgiving!

O, give thanks to the LORD, for He is good!

We thank God for all of our blessings -- too many to list!
 

The "BLESSED" banner dressed up the fireplace
for this Autumn season.

I used Huntington Papers along with the Glitter Paper
from CTMH,
and Sparkles, AND the Art Philosophy Cricut Cartridge 
for the letters and the leaf and acorn shapes.

Here's a peek at the paper turkeys (Hershey Nugget for the body)
that will flock to our Thanksgiving table
at each person's place setting.

I used a variety of retired fall-colored papers to make them.
The feathers are cut by using a Marvy punch,
and trimming the middle to 3/4
and the front to 1/2 the circle.

 
 Have a safe and happy Thanksgiving!
 

Wednesday, November 27, 2013

Sparkle & Shine Christmas Cubes


This trio of cubes was fun to make
using the CTMH Sparkle & Shine papers
and the CTMH Cricut cartridges too!

Turn the cubes and have a different message and scene each turn!

Tuesday, November 26, 2013

Merry & Bright Christmas Card Duo


Card 1 from the Merry & Bright Christmas Card Workshop at Rebecca's house...
I adapted the design to include my favorite Christmas stamps
on the front and in the inside.

Inside of card 1:


 Card 2 and the stamped envelope:
(The inside is blank for note-writing)


It's a countdown! 30 days until Christmas!

Monday, November 25, 2013

Sparkle & Shine Rejoice Christmas Banner


Here's one of my Sparkle & Shine banners
using that pretty new CTMH paper packet
and also one of the patterned papers from the retired Jingle packet
(behind the J and the I).

The CTMH Artbooking Cricut cartridge was used to cut the
trees and letters.
I used the Art Philosophy to cut the circles and circle frames.

I cut the pennant bases from poster board.

Additional items I used are the silver glitter paper,
Shimmer trim, Sparkles, and the Metallic flowers.

A closer view:

This banner is going into the mail 
to surprise two very special people,
with hopes that it brightens their living room with Christmas-y colors
and cheer.

Monday, November 18, 2013

"Faith"-Booking Layouts


Here are a few samples of "faith"-booking layouts I've created with the purpose of sharing my Christian faith and values with family members and friends who enjoy seeing my memory albums.

After being hit by a tractor-trailer on Interstate 69 near Indianapolis, I decided to journal about the happening, and share not only what happened, but also how the accident was a BLESSING in our lives. God's angels protected us from something so much worse that happened two miles further on the snowy, ice-covered road! Remember to add the negative life-happenings to your albums, not just the positive, and write how God brought you through them, provided care or protection, and how He worked in your life.

(Click on the photos to enlarge them.)


Ella and I love to giggle and sing and make up songs. Since she was a baby, I've sung "Jesus songs" to her and she has a large repertoire of favorites. She also loves musicals and memorizes all those favorite songs. I just had to document this photo from us at a Fox Theater musical. Someday, Ella may be IN a musical!

Sometimes it works well to hide journaling, as in the layout below. The title and the 8x 10 inch photo are enough to catch the eye on this page. So instead of cluttering the layout with writing, I measured the space to the right of the photo where I wanted to insert a pull-out journaling card (see the flower sticking out), and then cut the Memory Page Protector with an x-acto knife to that specific length.


I tucked the journaled card through the memory page protector, behind Ella's photo, and now, whenever we want to read my thoughts about her and my message to her, we simply pull it out.


More about faithbooking ... 

Recently a few friends came over for a faith-booking workshop. 

I pre-cut papers in a variety of colors and patterns to keep this a simple activity.
My Giggles & Grins layout was the sample with the simple elements--
title, photo mat, and journaling space.

Each one brought a totally different style of photo to feature on a one-page layout. 
One was a simple silhouette someone had cut of her from looking at a photo. 
Each person's layout turned out so unique and different. 
Each chose special Scripture verses and/or a hymn verse to emphasize the Christian witness she wanted to add to her page. 
It was a truly blessed afternoon together, and we plan to continue this! 
(I had cut "Truly blessed" from the Artbooking Cricut Cartridge 
for each person to use as a title if she wished.)

Here are a few of the works in progress below.

1)  This friend wants to use her layout as a 12 x 12 inch framed wall art, and may use her extra decor items that are placed off the page in a second layout.

Update: She used her decorative elements and finished her wall art! See the beautiful finished product below. 


Now for the next layout ...

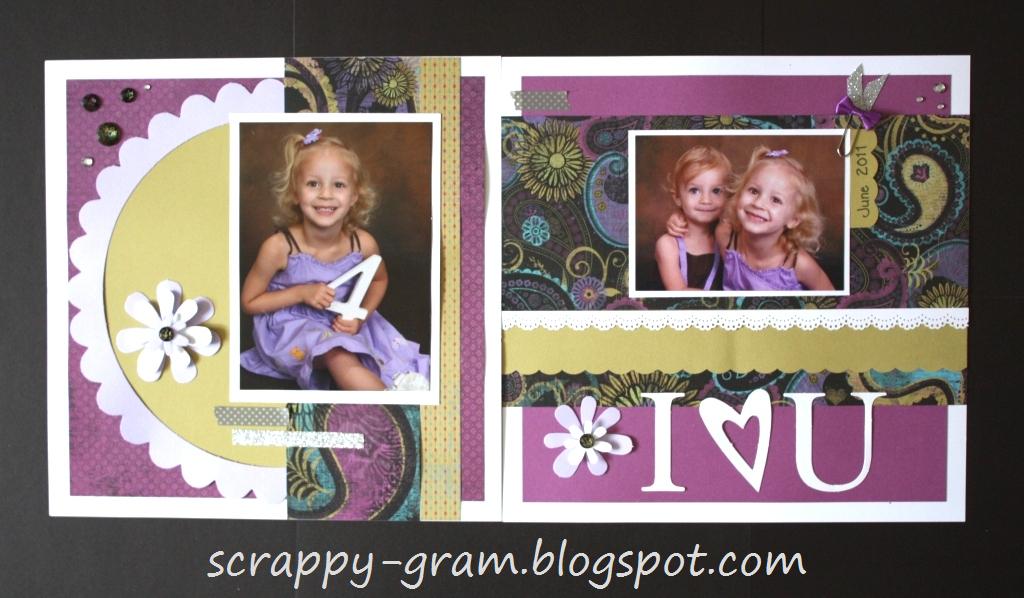
2) This friend jotted quite a few notes and Scripture verses, and wanted to finish her journaling at home in a quiet place. I can relate to that! It's hard to focus and write while the rest of us are chatting! I know she'll finish this page in a great way as she tells about being twin sisters and the blessings that come with that!

And another ...

3) This friend is completely new to scrap-booking, and I was so happy she joined us and dived right in with her family photo and Scripture verses that convey her message of being so truly blessed by the Lord. I hope she continues to create, because she has great ideas and I love being with her too!

Have you tried faith-booking?

As I get older, interjecting my faith statements into memory albums becomes more and more intentional and important to me. I want those who read the pages to know what I believe and what my values are. I want to tell my story, but even more important, HIS story and how God is present in my life.

Use the key word "faithbooking" (all one word) in the search bar at the top of my blog to see a few more posts about this subject. 

If you faith-book, or if you want more information and resources about faith-booking, leave a comment or send me an email. I'm compiling resources to share with others. I'll be happy to include you on the list!

Blessings, and happy faith-booking/scrap-booking!


Thursday, October 24, 2013

Noel Sparkle & Shine Christmas Card


Noel!
Today I made my second Christmas card for this year.
I used the papers from the Sparkle & Shine paper packet
featured in the Close To My Heart
mini catalog, "Holidays from the Heart Gift Guide."
(To see the Holidays catalog, click here.)

It doesn't look anything like my first Christmas card
I made last week with Sparkle & Shine!
(You can see it here.)

That's the fun of these CTMH papers and embellishments --
each creation looks different!


The card's base is a 6 x 6 inch Kraft card from CTMH.
For the dimensional poinsettia, I used the Artiste Cricut cartridge
to cut the flower die cuts and also the Noel title.
I layered four flower die cuts, and attached them with a sparkle brad.
I free-hand cut the leaves and tucked them underneath.
The white poinsettia is from a retired Mistletoe embellishment packet.
The burlap strip is cut from a length of CTMH's burlap ribbon.
I scanned a Christmas carol book page 
and then printed "The First Noel" onto colonial white cardstock
and trimmed the music to fit the card front.

Inside the card, I layered the Merry Christmas stamped sentiment
on a strip of Sparkle & Shine patterned paper,
and added a small pointsettia and sparkle brad
to the corner.
My inspiration in making this card came from 
a card (see below) created by CTMH Consultant, Sandy Trammel,
which she shared on the Scattered Hearts facebook group page.
Thank you for inspiring me, Sandy!
Happy scrapping, everyone!

Friday, October 18, 2013

A Frosted I Love You


"Frosted" -- one of my all-time favorite paper packets
from Close To My Heart!

I think it made a beautiful "I Love You" card,
don't you?
The doily stamp in these three layers reminds me of a precious quilt pattern--
a mixture of a Scandinavian and Pennsylvania Dutch design.
The tri-fold shutter card pattern is one of my favorites
to make and to give too!

I used:
CTMH Frosted papers
Classy Doily Flair stamp
Pearl stick pin from Bling Assortment
Small sparkle flower from Floral Accents
Sparkles Flourishes
Artiste Cricut Cartridge for "I Love You"
Opaque pearls
Itty Bitty Sparkles
Colored pencils
Sheer ribbon

Thanks for stopping by my blog and looking at my paper art!
Please leave a comment -- each one is so appreciated.
Happy scrapping!

Wednesday, October 16, 2013

It's Time to Sparkle & Shine!


The new Sparkle & Shine papers
from Close To My Heart's "Holidays from the Heart" gift guide
are so pretty and versatile!

I added strips of shimmer trim between the die cut ornament layers
for extra sparkle ...

Remember to add a surprise INSIDE your cards too!  
More sparkle is layered here on top of a strip of the patterned paper.

I left the inside empty to attach a family photo.
How many of these will I be able to finish before December 10,
the date circled on my calendar to "get cards mailed at the P.O.!" ?

Now--just a reminder--here's the new mini catalog that went live October 15
and you can order from it through December 31st.

When you order $100 or more in retail items from
this new Holidays from the Heart mini catalog,
you'll be able to choose a free "starred item" in the booklet.

Click HERE to see the catalog!
Click HERE to order!

Have fun making beautiful Christmas cards, layouts, 
and dimensional home art projects too!


Thursday, October 10, 2013

Autumn Harvest with Apple Pickers

Faithbooking Layout:  Psalm 145 selected verses

The Artbooking Cricut Cartridge, an exclusive product from Close To My Heart,
made this layout a simple task and a pretty autumn-themed story.

I cut the 10 inch tree overlay so I would have extra room 
for the additional gold strip across the top of page 2,
where the words of selected verses of Psalm 145 continue from page 1.

A variety of Fall colored cardstock
along with the die cut leaves, apples, and pumpkins
made this clean and simple layout perfect
for showcasing the grandgirls while apple picking and giggling together.

Because I have more vertical and horizontal photos,
I'll add a few layers of Flip Flaps
once the Memory Protectors are on these pages.

I like to "faithbook" these special times together,
and add Scripture verses to remind us all
how good God is, how abundantly He blesses us,
and how He is always with us, day in and day out,
even as we pick apples and make apple crisps--
gifts from His beautiful world.

We can simply give Him our praise and thanks 
from morning until night!

Friday, October 4, 2013

First Day of School

First Day of School -- Artbooking Layouts


For this "First Day" of school two-page layout, 
I used the CTMH Artbooking Cricut Cartridge to cut the title, photo mats, 
and "Think-Grow-Learn" section.

The primary colors of the retired paper packets, School Zone and Rough & Tumble, 
will compliment the photos of first grader Ella
that her mommy will add to the layouts.
The big yellow bus -- the first day outfit -- the new lunch carrier & backpack ...
so much new Grade 1 FUN!

Have you used your Artbooking cartridge?
Tell me how much you like it!

If you don't have yours yet,
please visit my web site and read more about the 700 images that are included!
It's easy to order and have your items delivered right to your door!

Happy Back to School Days!


Wednesday, October 2, 2013

You're Tweet!


You're so "tweet" that I made this Kraft container for you
to hold a treat of Hershey's Nuggets with almonds.
I promise to keep it filled, too!
Because I know those Nuggets won't last long!

It's ALL CTMH except the goodies in gold inside:

My Creations Kraft Container
Huntington papers
Burlap ribbon
Sheer ribbon 
Brown & Tan Sparkles
Bronze Glitter paper
Barn Red Ink
Brown Bag Ink
April SOTM--My Sunshine


Tuesday, August 27, 2013

from summer sunrise to sunset


I love summers, and wish that summer would BE endless!
Though we're in the dog days of summer now with 
the thermometer reading near 100 degrees F each day,
I'd much rather be warm than cold!
And we always find a pool or a clean Missouri lake
where we can be refreshed.

I'm going to have to do a layout just showing our little "Goggles Girl."
She does everything in her hot pink goggles--eat breakfast, ride in the van,
play with her dolls, and even color and craft with me.
(I combined Surf's Up with Dream Pop papers
because of the great pops of color in the pinks and sorbets!)

These are my first attempts using the NEW CTMH Cricut Artbooking cartridge
for the layout title and overlays.
This new product provides 700 different patterns for titles, page overlays,
memory book page patterns, borders, and icons!
You can find it in the new Autumn/Winter Idea Book HERE.

 Journaling across the top in black marker reads:
"from summer sunrise to sunset, 
we're so happy to be playing in the lake or pool water together" 
I like to write memories by hand so that those browsing memory books in the future
will see my handwriting and read my impromptu thoughts.

Layout Left Side


Layout Right Side

I used:
Surf's Up! paper packet
Surf's Up wooden button embellishments
Dream Pop paper packet
CTMH Cricut Artbooking cartridge for title & overlays
"My Sunshine" -- April Stamp of the Month 
(for the sunshine words on the sun overlay and for the sunset)
Sorbet Ink


Saturday, August 24, 2013

I {Heart} Flip Flaps!

Laughing Lola Layout with Flip Flaps on left, top, and right
(After taking the photo, I moved the top Flip Flap to the right so it was even with the layout page.
Photos were taken with the Memory Page Protectors on, creating a slight glare.)


Left side, Flip Flap closed

Right side, Flip Flap closed & top, Flip Flap down

Right side, Flip Flap open

Look! Look and see!
Look and see how Flip Flaps can add photo space to your layout!
Here's my original two-page layout where I used only two photos.


By using three of the 6 x 12 inch Flip Flaps,
I was able to add SEVEN more photos and areas for stamping!

I have SO much more fun scrapbooking memory album pages
with the help of Close To My Heart's Flip Flaps.

They're available in a:
*  Small Assortment (4 each of the 2 inch square; 3 inch square; 3 x 4 inches; and 4 inch square)
*  Ten-pack of 6 inch squares
*  12 Inch Assortment (4 of the 6 x 12 inch, 2 of the 4 x 12 inch, and 2 of the 8 x 12 inch)
*  Photo Size (15 of the 4 x 6 inch)
 You can find Flip Flaps in the NEW Autumn/Winter Idea Book on page 135. 
It's simple to slide your photos and artwork into the pockets,
and attach the Flip Flaps to your Memory Page Protector with the adhesive strips.
Click here to begin!

I'm laughing and flipping over Laughing Lola papers and these great Flip Flaps!


Wednesday, August 21, 2013

Hahahahahaha! My Laughing Lola Layout!


What's purple, green, turquoise, and paisley,
and makes you feel happy?
Laughing Lola!

(It's one of the NEW paper packets from Close To My Heart!)

Hahahahahahahahaha!  

You truly have to see these papers in person 
to appreciate the gorgeous colors and patterns.
The laugh is on me!  Until I saw them IRL,
I didn't think they'd be for me.

Hahahahahahahahaha!
Look how great they look with my photos!


Is this little satin bow clip cute, or what?!
Just a little girly touch for the photo corner.
Hahahahahahaha!

Can you tell where my pull-out journaling is on this second page?
Look closely!

I like to hide journaling to keep the layout very simple,
and then cut a slit into the memory page protector
to be able to pull out a piece of cardstock
on which I've written something special.

On this page, I've written how much I love these grand-girls,
and also how much Jesus loves them--
so much that He died on the cross to take away all our sins--
so much that He came alive on the first Easter,
so that someday we who believe in Him can live with Him in heaven!

This journaling is part of my "faithbooking" habit--
to share my faith, Scripture verses, inspirations,
encouraging words from The Word,
and to tell generations after me what I believe and why.
Telling HIS-story is vitally important to me!

How do you tell your story?

I used:
Close To My Heart's NEW My Reflections Laughing Lola paper packet
Laughing Lola Assortment of Embellishments (satin bow clip; multicolor gems)
Sparkles
Shimmer Trim
Washi tape
Dazzling Die Cuts in Spring Harmony & White
The "Backstage" pattern from the book Magic by Jeanette Lynton (CTMH CEO)

Have some GREAT laughs and get yourself creating with Laughing Lola!

Tuesday, August 20, 2013

A Huntington Sweet Treat


Sweet!

Almond Nuggets inside a My Creations Kraft Container = 
a sweet thank-you gift for a friend's help with making all the wedding bouquets!

Who doesn't like to get chocolate?! 

I used:
Close To My Heart MyCreations Kraft Container
Huntington Paper Packet (NEW!)
Huntington Workshop On The Go Stamp Set: Sweet (NEW!)
Burlap Ribbon
Barn Red Ink
Brown & Tan Sparkles (NEW!)
(I used the B&T paper border on top of the burlap ribbon. Love those borders!) 

Want to see all the new Close To My Heart products?
Click HERE


Paper Art from StudioJane

Samples of my created paper art ...

Clear Acrylic Cards

Greeting Cards

Mix 'n' Mingle Album

Gift Albums

Memory Keeper Boxes

Art Keeper Boxes

Thank You Note Cards

Custom Gifts

Christmas Greeting Cards

Pregnancy Journals--Display Albums

For Baby

Floral Photo Note Cards